This page an update to my previous post Project LED headlight to where i incorporate it already to my sinski 150cc headlight housing. (actual BEAM shot on road not yet taken)
The photo shown with a beam shot taken at an angle of 45 degree in front.
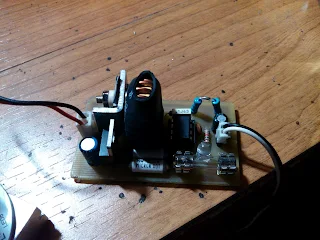
Constant current led driver is needed to prolong the life of the led array and to compensate for the changes in input voltage during use.
The headlight housing to where i'll be incorporating this led headlight prototype to replace my scooter filament type headlight. The original uses 35watts for low beam and 35 watts for high beam.
Headlight lens need to be removed in order for me to fit the led headlight collimating lens. The cover of the headlight was easy to dismantle..(note that new or brand new housing is not that easy to remove because of the anti moist glue.) my headlight perhaps due to the long period it was stock, the glue just didnt stick that much, and dis assembly was a snap.
With the original bulb remove, the hole to where my led headlight bare board, is actually fit, like pair made for each other..:-)) and no more additional drilling holes for this project.
Perfect fit without the collimating lens.
with collimating lens attached on the led array to focus the beam in front.
view of the heatsink for the bare board of the led array. Heatsink is needed, (fan not necessary when the bike is moving, rushing air in front will cool down the heatsink..
And its time to power up the led headlight to see how it went well. I used for this test 12 volts 1.5 ampere wall adapter.
About Me
Blog Archive
Find Us On Facebook
Random Posts
My youtube channel
TEST
Recent Comments
Popular Posts
-
Installing High Intensity Discharge on a small motorcycle which utilizes the Half Wave charging system will surely have lots of problem wh...
-
DC-CDI counterpart of AC-CDI is an ignition analog or digital that uses low voltage external power supply to work. the difference AC-CDI ne...
-
A full wave regulator is a type of regulator mostly found on small motorcycle that can enhance the charging system of motorcycle battery. ...
-
Here is another voltage regulator for motorcycle design to be used on single phase stator. This is the simplest full wave design commonly...
-
Introduction: This project is a voltage regulator for a 3-phase, permanent-magnet alternator found on motorcycles. The same des...
Recent comments
Techy at day, Blogger at noon, and a Hobbyist at night
Most Popular

DC-CDI schematic (updated)
8/20/2010

Wave 125 S Panel Repair
7/07/2011

Yamaha Mio Soul Led Headlight Conversion
2/18/2015
Featured Post
 speedometer repair
BRISTOL ADX160 PANEL GAUGE MAJOR ISSUE
MCircuits
7/27/2025
BRISTOL ADX160 is a MAXI SCOOTER With a resemblance of a HONDA ADV150 avai…
What I do

follow me at facebook
Popular Posts

DC-CDI schematic (updated)
8/20/2010

Wave 125 S Panel Repair
7/07/2011

Yamaha Mio Soul Led Headlight Conversion
2/18/2015


0 Comments
If you have any inquiry about the post, you can contact me directly at my email address. Click ABOUT above and drop to contact to reveal it.Thank you.